Colour inside the lines... and the left atrium!

Improving step by step: segmentation

Remember when you were 4 and you used to draw and paint pictures of cute animals or superheroes? Remember what your parents and your teachers used to tell you? “Colour inside the lines, do not cross the lines when you are painting!”. Well, in my case, I was never good at drawing or painting, I always crossed the lines. I tried to move through life spending the minimum amount of time doing these activities. However, we grow up and we have to adapt and improve, because guess what? I am spending hours these days trying to contour the left atrium!

Before I started with the contour, however, I had to get my eyes used to the anatomy of the heart in Cardiac Magnetic Resonance (CMR) images in order to locate the left atrium. In the image on the right we can see the heart in the transverse plane. Which structures can you differentiate? I am still getting used to these CMR images, but it is possible to differentiate the aorta, right and left ventricles, the right atrium and left atrium with the left inferior and right superior pulmonary veins.


Left atrium contouring in the transverse plane

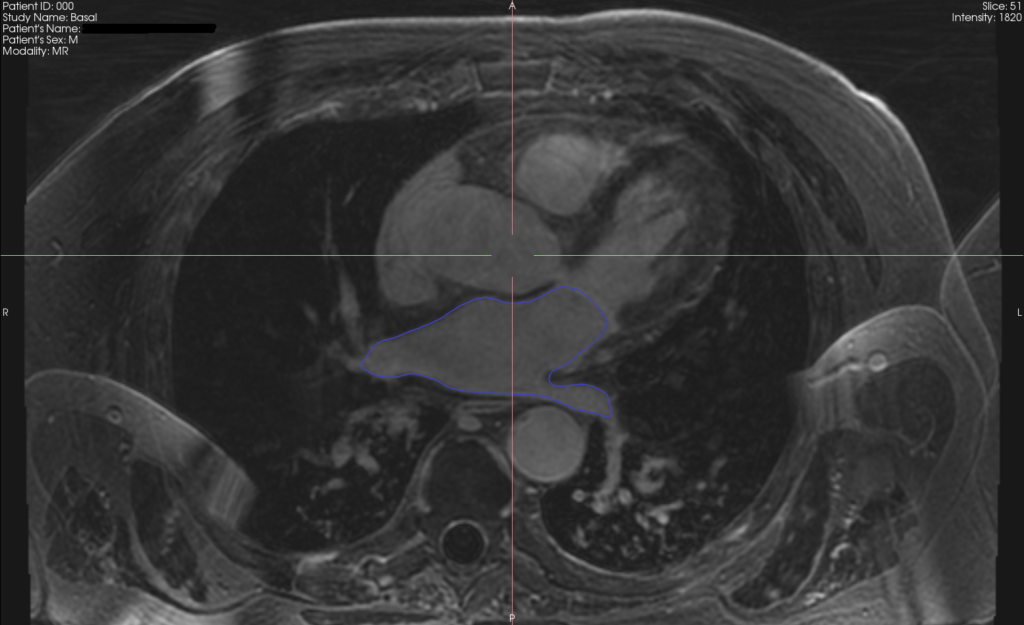
Once you can locate yourself in the heart anatomy is when the contouring starts. This is the moment when you realise you should have payed more attention as a kid. If you check again the previous image you can see something that perhaps is difficult to notice at a first glance. If you force your sight, you will see how I contoured with a blue line the inferior left cavity of the heart seen in the image, which corresponds to the left atrium. This line will help to segment this structure using ADAS 3D software, because to perform segmentation with this software it is necessary to draw the contour around the left atrium on several slices. Thanks to the software capability to interpolate the contour around several slices, we don’t need to contour the structure on each slice. And I can tell you, from my side, I need to say thank you for that, because due to my contouring skills I need some time to perform the segmentations.

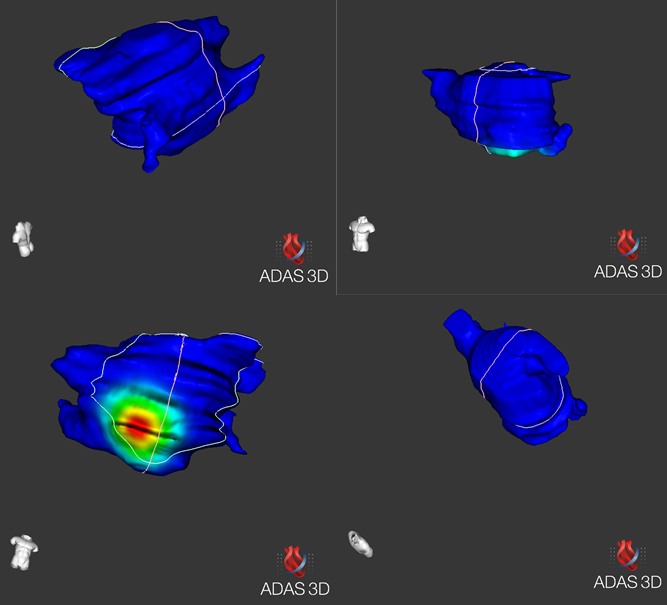
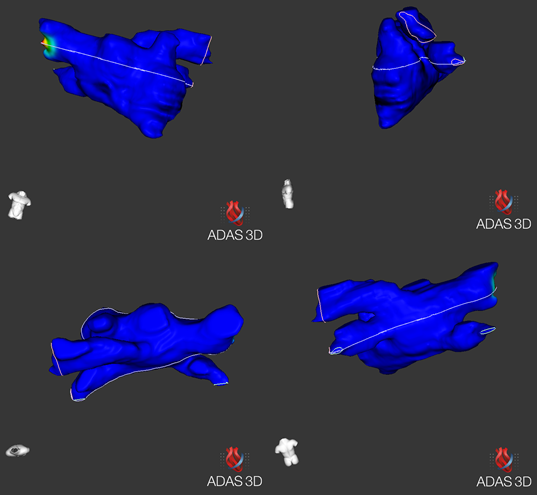
However, with practice comes mastery! After repeating some segmentations, it was clear that I had improved in the 3D model creation. And I can prove it! In the down figures you can see my first segmentation on the left and one of those I have lately been doing after 2 weeks of practice on the right. You can observe how in the first segmentation there is a bumpy volume with some extrusions. It hardly resembles a left atrium. You can distinguish the pulmonary veins, but the left atrium appendage is not in the volume. Moreover, you can appreciate the slices where I did the contouring and the interpolated ones. Since I made irregular contours, the interpolations did not function properly, and this made the atrium look bulky. On the right side, however, you can distinguish a better-looking left atrium. The pulmonary veins are now clearer, especially in the posterior and cranial views, and the appendage can also be seen in the anterior, lateral and cranial views. Not only that, the volume is smoother, with less bumps on the atrial wall, because the interpolations and the post-contouring adjustments improved. 


First segmentation in several plane views
Improved segmentation after practice in anterior, left-lateral, cranial and posterior views

This segmentation procedure is just one of the many parts of the job, though. I need to know how to work with it and improve it in order to be able to move forward in the analysis of the images, for which I will also be learning other techniques like image registration between different modalities, such as Electro-Anatomical Maps (EAM) and CMR. Hopefully I will get to show you some nice improvement with these other techniques just like I did with segmentation! 

First of all, however,  I will have to read papers just as I have been reading papers during this past month. This paper search has allowed me to get used to the methodology of other research groups, to understand their computational methods to detect fibrosis, to learn about the theory behind these computational methods and to structure it all in my head. I have been learning new concepts such as Image Intensity Ratio (IIR) or the association between Conduction Velocity (CV) and fibrosis, which if you find interesting you will find information of them in this and this other paper. 

Hence, you see, since we weighed anchors, we have been sailing through the #AFib sea, and although we are just beginning and we can still see shore, the winds are in our favour and we are moving forward. Step by st- well, cable length by cable length, since we are sailing. Now let me go back to improving my contouring skills. See you in the next port!

Eric Invers Rubio


If you want to join me and the rest of the network in our journey, don’t forget to follow us in our social media using the hashtag #PersonalizeAF!